Start from the sign-in screen to confirm that you are entering through the correct product entry point before touching project scope or workspace.
Get Started With Midi Coder
This page takes you straight through the getting-started path in Midi Coder: login → org/project → settings → provisioning → workspace → version → pipeline. Within a few minutes, you should be able to open the workspace, create the first version, and follow artifacts plus diffs inside one clear flow.
Which Flow Are You Walking Through In These 5 Minutes
5 minutes does not mean learning the whole product. It means going through a short but real path where repo, workspace, version, and pipeline appear in one continuous flow.
If you finish this path, you have completed a full first run: the project is ready to open in the workspace, the first version has been created, and the pipeline begins to appear as an inspectable flow.
Step 1. Sign In And Enter The Right Working Scope
The first step in the flow is not just about typing credentials and moving on. You first need to register an account so the team can support the creation of the matching Org for your working space.
That registration follows a very clear email-domain rule:
- the registration email must be an administrative email for a specific company or working domain
- public mailbox addresses such as
@gmail.comcannot be used for this registration flow - only the first account from a given domain can self-register to open that space
- every later account in the same domain must be invited by the first registered email through the system
Read correctly, this is not a standalone authentication screen. It is the step where the system identifies the initial domain owner for the Org and determines which users must be invited afterward.
Once the team has supported the creation of the Org, the next login will let you see the current Org directly and continue through the working flow.
The checkpoint for this step is simple: the first domain account has registered successfully so the team can support Org creation, or you have received a valid invitation from that first domain account, and after login you can already see the current Org.
Step 2. Choose The Right Org And Project Scope
Once you are inside the system and can already see the current Org, the next step is to enter the organization setup layer. This is where the flow leaves account administration behind and locks the right operating space at the Org level before attaching itself to a specific project.
At this stage, you need to lock in three things clearly:
- you are inside the correct
Orgthat will operate the project - you have selected or created the correct
Projectto work on - your current access level is enough to continue into
Project Settings, provisioning, and workspace
Only an Org administrator can access the setup area for the current Org. This is also the point where permissions and member management are configured at the organization level before users are distributed into the right projects.
If step 1 locks the right domain identity, step 2 locks the right operating space. From this point on, the repo, settings, workspace, version, and pipeline will all attach to the same project instead of a vague scope.
The checkpoint for this step is simple: you have opened the correct Org/Project, the Org administrator can access the matching setup area, and the current route now points to the working space that will be used through the rest of the flow.
Step 3. Create The Project, Configure It, And Start It
Once the correct Org has been locked in, the flow moves into the operating layer of the Project. This is where you create the real working project, finish the technical setup, and move the project into a state that can be started.
At this stage, three actions need to stay together:
- create or choose the correct
Projectthat will attach to the repo and workspace - complete
Project Settings, including GitLab connection,BYOK,Provider / Model, and the required guards - press
Provision Projectto start moving the project from configuration into a working environment
Read correctly, these are not three disconnected screens. Creating the project only defines the working unit. Configuring the project tells the system which repo will be controlled, which secret is allowed to be used, and which model will run in the flow. Starting the project is the point where the backend begins creating the workspace, cloning the code, installing CE, and preparing the project vault.
The checkpoint for this step is simple: the project already exists inside the correct Org, Project Settings already contain the minimum required data, and Provision Project has been triggered so the project can begin entering an operational state.
Step 4. Enter The Workspace And Create The First Version
Once the project has been started and moves into a ready state, the flow reaches the most important layer for a developer: entering the real workspace and creating the first version so the first change becomes something operational.
At this stage, you move through two connected layers of action:
- enter the
Workspaceto see the file tree, the editor, basic git actions, and the artifact review area inside the IDE - create the first version from
developmentso the system can create the branch, initialize the CE workspace, and connect that version to the pipeline
The important point here is that the workspace is not a black-box screen. You are entering the real codebase of the project. The first version is also not just a metadata record; it is the boundary that branch, state, artifacts, and diff will all attach to as one reviewable change.
Read in operational terms, this is the point where the flow moves from “the project is ready” to “the first change now has a clear shape.” Once the version is created, the pipeline can begin from the index stage and every signal after that will attach to that version.
The checkpoint for this step is simple: you have opened the project workspace, created the first version, and can already see that version become the anchor for the next technical flow.
Step 5. Execute Through The Pipeline
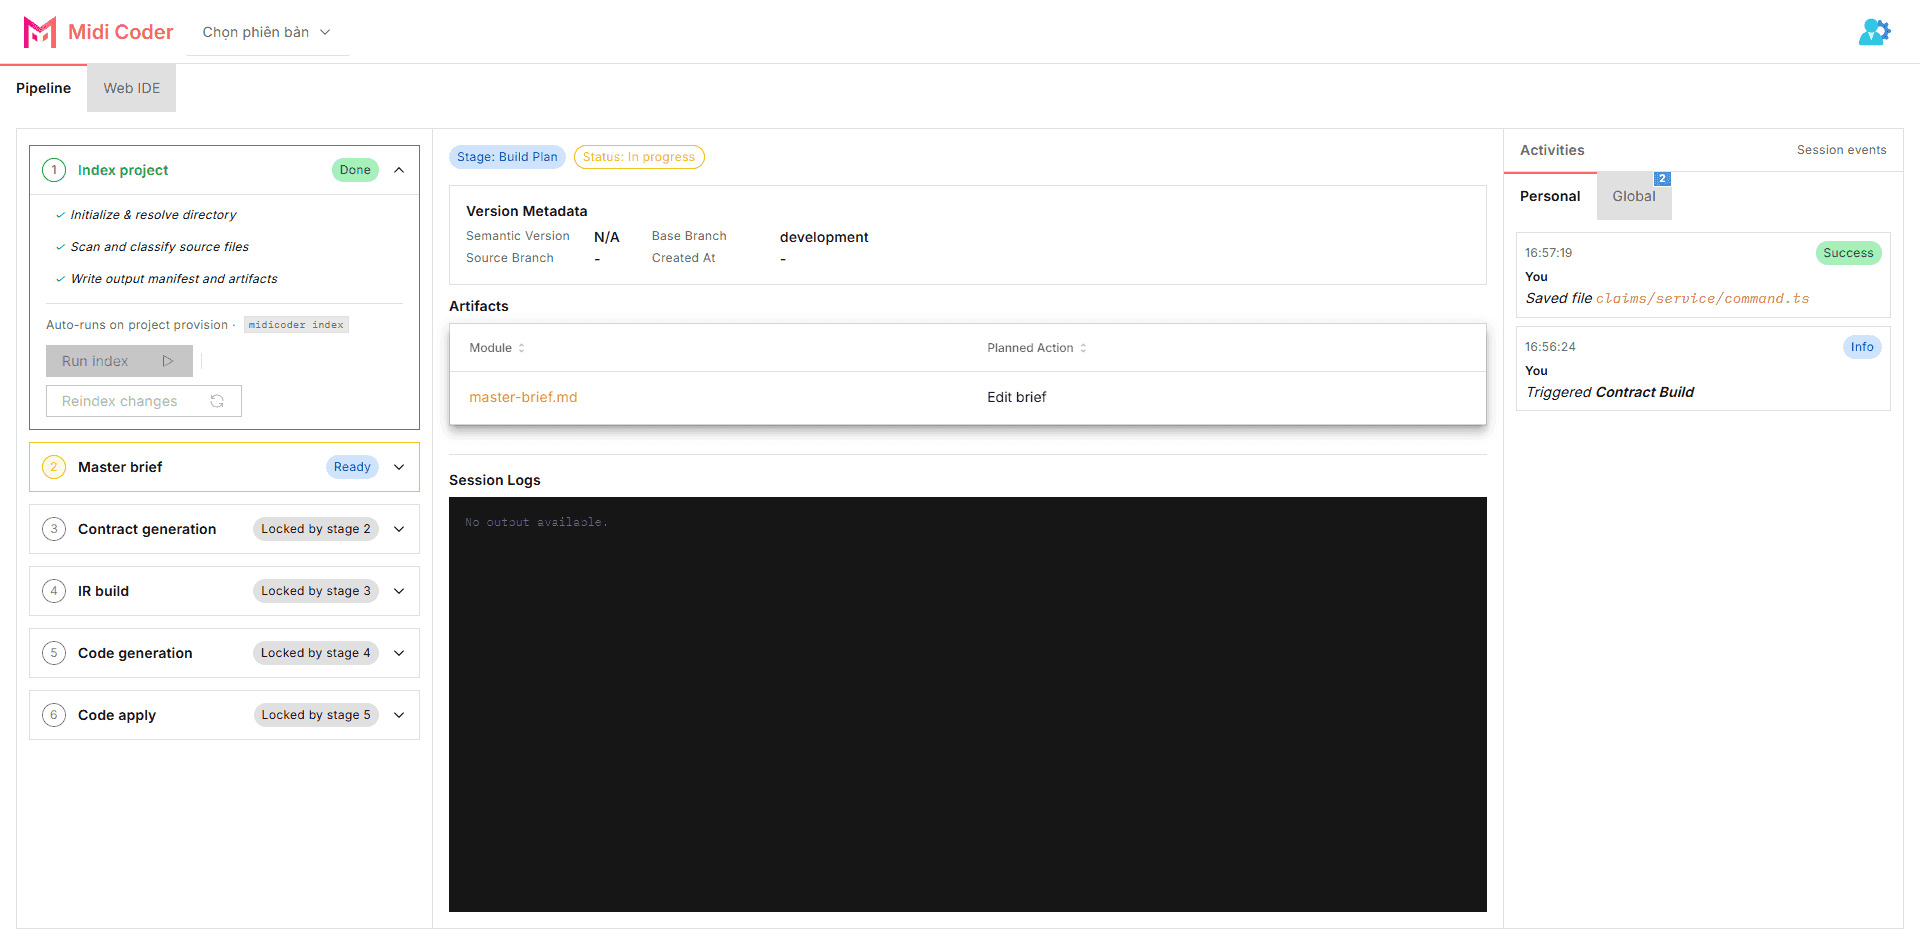
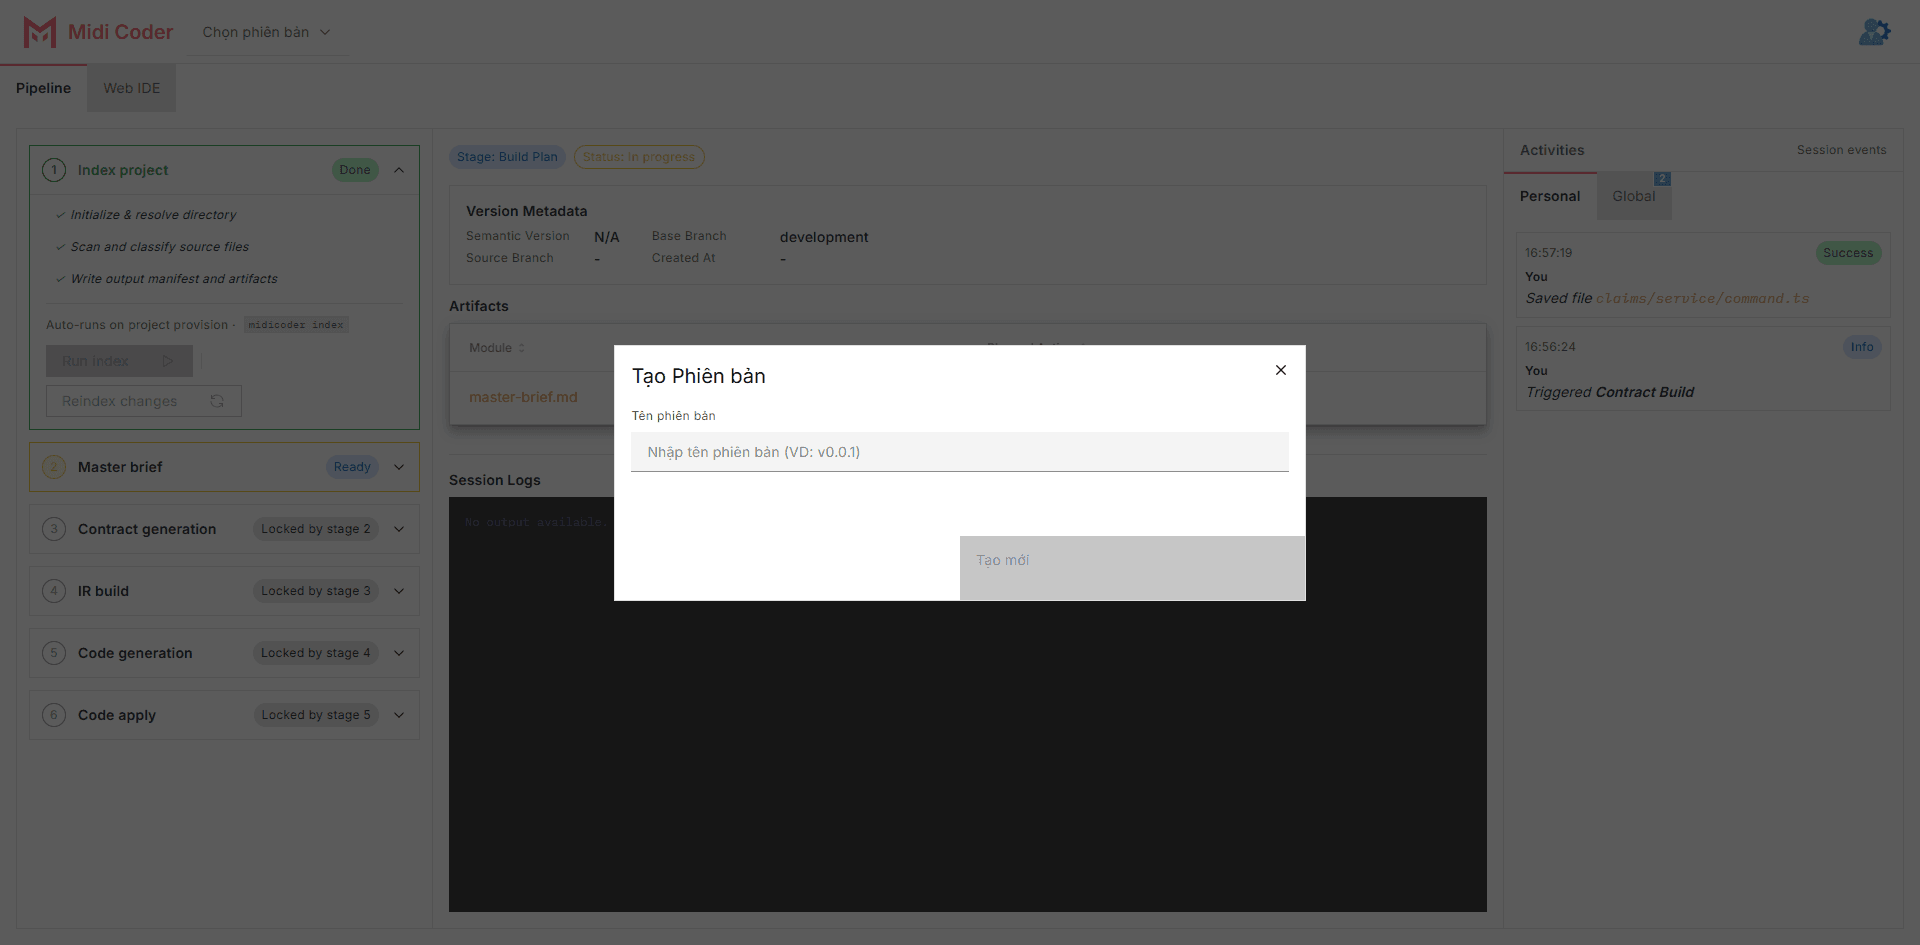
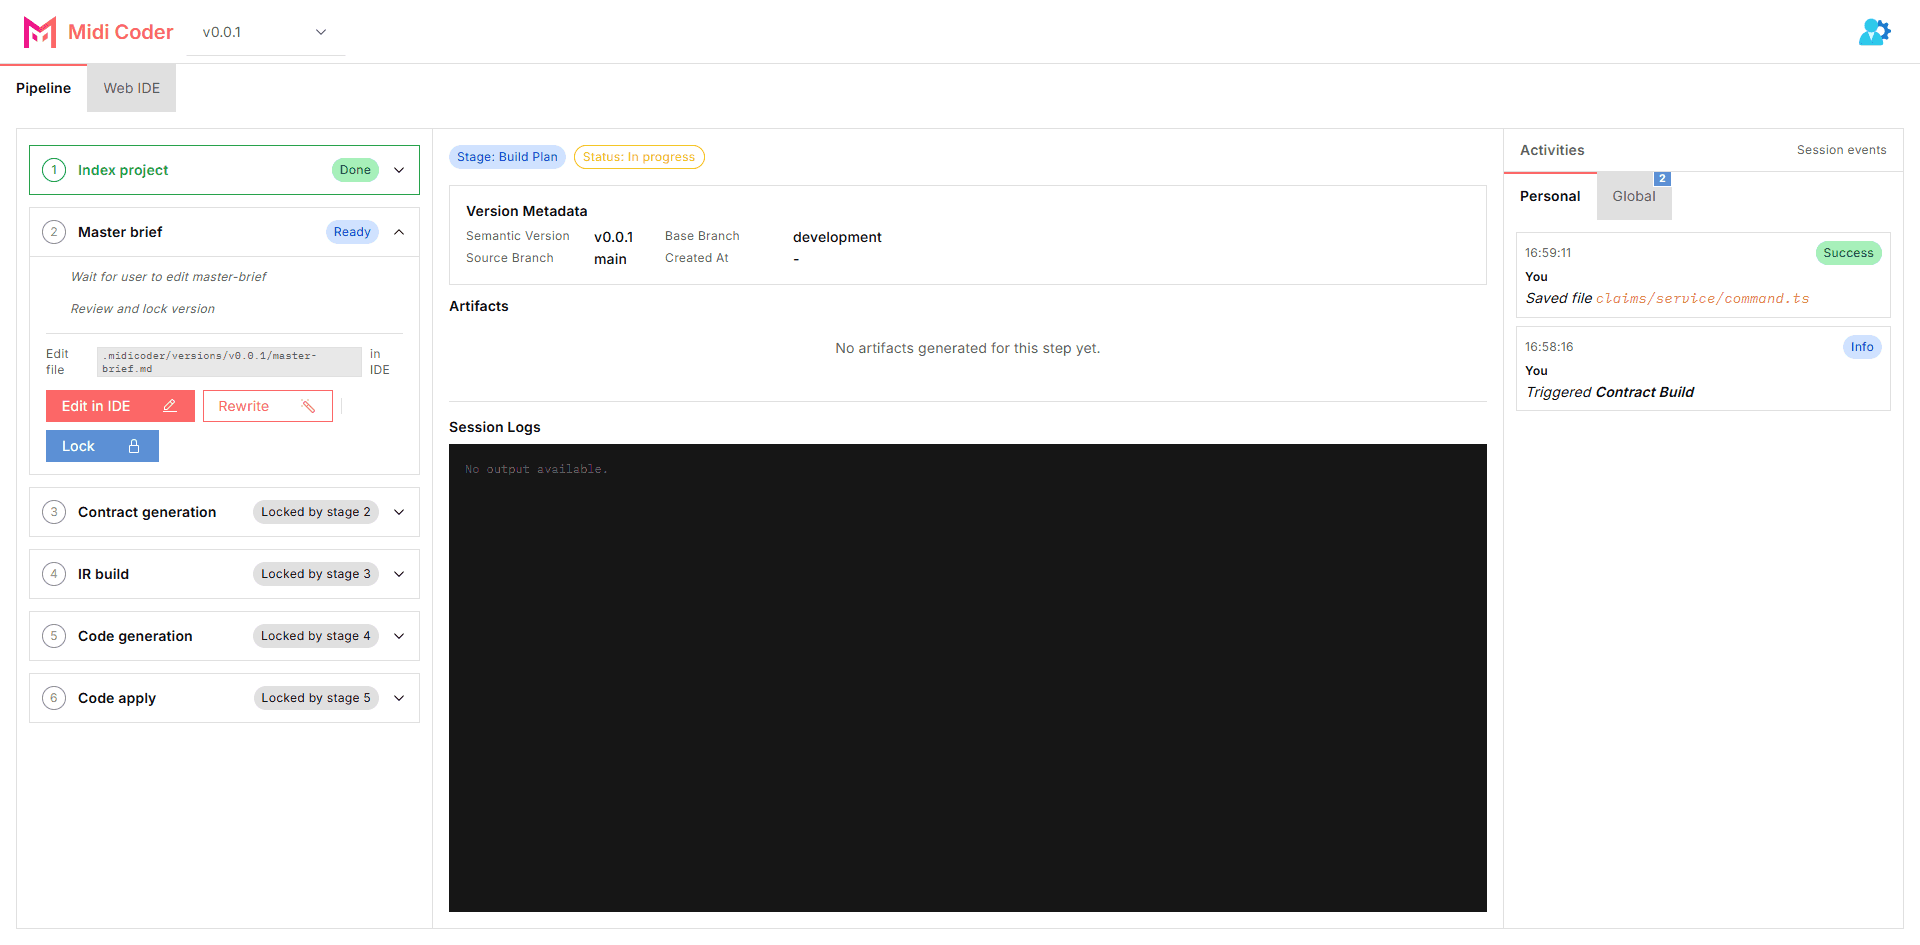
Once the first version has been created, the flow does not stop at having a new branch. From this point on, the system starts executing through the pipeline so the change moves through a sequence of stages, artifacts, and diffs that can be inspected.
At this step, the most important thing is to read the pipeline as a running flow, not as a decorative status row:
- the pipeline starts from the
indexstage and continues through the remaining stages in the flow - each stage has its own state, and that state attaches directly to the version that is running
- artifacts appear along the way, including brief files, contract output, patches, and finally the
file diffat thecode applystep
The important point here is that the value of the pipeline is not the final answer alone. The value is that you can see what the system is doing, which stage it is in, which artifacts already exist, and which diff is about to enter the codebase.
If step 4 gives the first change a concrete shape, step 5 turns that change into a flow that can be observed and reviewed. This is the point where state, artifacts, and diff begin connecting into one clear execution path.
The checkpoint for this step is simple: the pipeline is already running on the first version, the current stage is visible, artifacts have started to appear, and you can trace the flow from version to diff instead of waiting for a final output only.
Possible Issues And System Guardrails
This is not the next required step in the flow. It is a reference section that helps you understand the issues or blocked states you may encounter while the system is already running for real.
Once the flow is running, some actions may be deliberately blocked so state, version, and pipeline do not drift apart. The common situations include:
- missing
BYOKor missing required configuration to continue - the project is not yet in
readystate, so actions remain locked - the user does not have enough permission at the
OrgorProjectlevel - the workspace or IDE is in read-only mode according to the current state
- some actions are locked so the flow keeps attaching to the correct running version
The important thing to understand here is that most of these states are not random bugs. They are signals that the UI is reading the real backend state instead of opening every action just to create a false sense of smoothness.
Seen from a developer perspective, this is a good sign. A system with serious review, artifacts, diff, and pipeline execution cannot leave every action open regardless of the project state.
The right way to read this section is simple: when an action is blocked, check the current Org, Project, version, permission level, and required configuration before treating it as a system error.
What To Read After The First Run
Once you complete the first flow, the next step is not to return to a longer onboarding page. At this point, you only need to choose the right direction to go deeper based on what you want to understand next.
- If you want to understand Contract Coding at the conceptual level, continue with Contract Coding.
- If you want to understand why this flow goes through contract, validate, IR, code plan, and patch, continue with How Contract Coding Works.
- If you want to know whether this model fits your team, continue with Showcases.
- If you want broader documentation and guidance, go to Guides.
- If you need community context or a support-oriented entry point closer to real usage, go to Community Open Source.
This page should end here: enough to get you through the real flow, and enough to tell you what to read next without drifting into a much broader document.